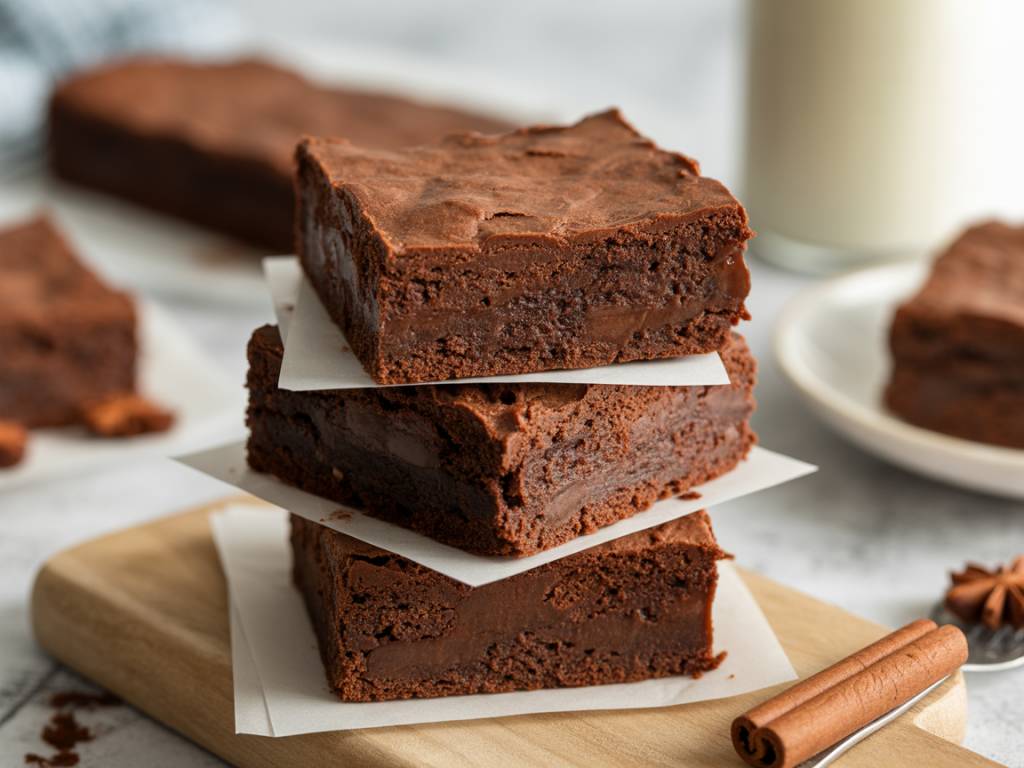
Fudgy, dense, still slightly warm from the oven… a good brownie doesn’t need eggs or butter to be indulgent. If your pantry is mostly organic and plant-based, you probably already have everything you need for rich vegan brownies on a Tuesday night.
In this article, I’ll share three dependable vegan brownie recipes built around organic pantry staples, plus all the practical details: which cocoa to choose, how to get that shiny crackly top, what to swap if you’re out of maple syrup, and how to store leftovers (if there are any).
What makes a good vegan brownie?
Classic brownies rely on eggs and butter for structure, richness and that fudgy texture. In a vegan and organic version, we’re aiming to replace those functions without replacing them with ultra-processed ingredients.
Here’s what we’re looking for:
- Fudgy, not cakey – more dense than a sponge, with a slightly underbaked center.
- Deep chocolate flavor – good cocoa and a touch of coffee or vanilla.
- Moist, not greasy – enough fat for richness, but no oil slick on top.
- Simple ingredients – mostly things you already stock: flour, cocoa, sugar, oil, nut butter, plant milk.
The trick is to combine a few key elements:
- Fat (coconut oil, olive oil, nut butter) for richness and chew.
- Liquid sweetener (maple syrup, agave, date syrup) for moisture and shine.
- Binder (ground flax, chia, or just a thick batter) to hold everything together.
- Strong cocoa – where most of the flavor comes from.
Choosing the right organic staples (and how to read labels)
Before we bake, a quick tour of the main ingredients and what to look for when you’re shopping organic.
- Cocoa powder
Look for organic, unsweetened cocoa powder. Natural cocoa gives a slightly lighter, fruitier chocolate flavor. Dutch-processed (alkalised) cocoa is darker and smoother. Both work; just avoid “drinking chocolate” mixes (usually sweetened and too weak). - Flour
For classic fudgy brownies, use organic plain white flour. You can swap up to half for wholemeal flour, but going 100% wholemeal gives a more rustic, slightly drier result. If you’re using spelt, reduce the liquid very slightly as it can make batter looser. - Sugar
Organic cane sugar or light brown sugar works beautifully. Brown sugar adds moisture and a subtle caramel note. If you want to reduce refined sugar, combine it with maple syrup rather than replacing it entirely. - Plant milks
For the fudgiest texture, choose an unsweetened organic milk with a bit of fat: soy, oat or almond. Rice milk is usually too thin; coconut milk (from a carton, not a can) is fine but can bring a coconut note. - Oils and fats
– For a neutral taste: organic sunflower or light olive oil.
– For extra flavor: a mild extra-virgin olive oil pairs surprisingly well with dark chocolate.
– For a richer, firmer brownie: a mix of oil and melted coconut oil works well, especially if chilled later. - Nut butters
Choose organic peanut, almond or hazelnut butter made from 100% nuts, without added sugar or palm oil. Stir the jar well to reincorporate any separated oil so your measures are accurate.
On organic labels, you’ll often see certification logos (Soil Association, EU organic leaf, etc.). For cocoa, sugar and nuts, this usually means:
- No synthetic pesticides or herbicides on the crops.
- No GMOs.
- Stricter controls on additives and processing.
Not all organic is automatically “fair” for farmers, so if budget allows, favor cocoa and sugar that are both organic and Fairtrade or equivalent. It’s good to know your brownie doesn’t depend on unfair working conditions.
Core recipe: one-bowl fudgy vegan brownies
This is the base recipe I reach for when I want classic, rich, fudgy brownies with minimal washing up. Everything happens in one bowl, a whisk and a spatula are enough, and the ingredients are very forgiving.
Makes: 1 square tin, about 20 x 20 cm (8 x 8 in) – 12 generous brownies
Prep time: 15 minutes
Baking time: 20–25 minutes
Ingredients (all organic where possible)
- 150 g plain flour
- 50 g cocoa powder (unsweetened)
- 200 g cane sugar (or 150 g cane sugar + 50 g light brown sugar)
- 1 tsp baking powder
- ¼ tsp fine sea salt
- 120 ml neutral oil (sunflower or light olive oil)
- 120 ml plant milk (soy, oat or almond)
- 60 ml maple syrup (or agave syrup)
- 2 tsp vanilla extract
- 2 tbsp ground flaxseed + 5 tbsp water (optional, for extra binding)
- 80–100 g dark chocolate chips or chopped dark chocolate (70% cocoa), plus extra for topping
Method
- Preheat your oven to 180°C (160°C fan). Line your tin with baking parchment, letting it overhang slightly so you can lift the brownies out later.
- If using flaxseed, mix the ground flax with the water in a small bowl and set aside for 5–10 minutes. It will thicken into a gel.
- In a large bowl, whisk together the flour, cocoa, sugar, baking powder and salt. Break up any cocoa lumps with the whisk – once you add liquid, they’re harder to fix.
- Add the oil, plant milk, maple syrup, vanilla and the flax mixture (if using). Stir gently with a spatula until just combined. You want a thick, glossy batter – more like a paste than a cake batter. If it looks dry, add 1–2 tbsp extra plant milk, but resist the temptation to over-loosen it.
- Fold in the chocolate chips, keeping a few back for the top.
- Scrape the batter into the prepared tin and smooth the top. Sprinkle over the remaining chocolate.
- Bake for 20–25 minutes. The edges should look set and slightly pulled away from the sides, but the center should still feel soft and slightly wobbly when you gently shake the tin.
- Remove from the oven and resist cutting immediately. Let the brownies cool at least 30–45 minutes in the tin; they will continue to set as they cool.
- Lift out using the parchment, transfer to a board and slice into squares with a sharp knife, wiping the blade between cuts for neater edges.
Texture tip: If you prefer very gooey brownies, take them out when the middle is still quite soft and chill the cooled slab in the fridge for at least 1 hour before slicing. Chilling helps the cocoa butter and oils firm up, giving you that dense, truffle-like interior.
Almond butter swirl brownies (no flax, extra protein)
For days when you want something a bit more “grown-up” and nutrient-dense, this version replaces part of the oil with almond butter. The swirl on top looks impressive, but it’s actually just a spoon and a few lazy zigzags.
Makes: 1 square tin, about 20 x 20 cm (8 x 8 in)
Ingredients
- 120 g plain flour
- 40 g cocoa powder
- 160 g cane sugar
- 1 tsp baking powder
- ¼ tsp fine salt
- 80 ml neutral oil
- 80 g almond butter, well stirred
- 150 ml plant milk
- 2 tsp vanilla extract
- 60 g dark chocolate chips
- Extra 2–3 tbsp almond butter for the swirl
Method
- Preheat the oven to 180°C (160°C fan) and line your tin with parchment.
- In a bowl, whisk together the flour, cocoa, sugar, baking powder and salt.
- In a separate bowl or jug, whisk the oil, 80 g almond butter, plant milk and vanilla until smooth.
- Pour the wet mixture into the dry ingredients and fold together just until no dry pockets remain. Stir in the chocolate chips.
- Spread the batter in the tin. It will be quite thick; use a spatula to push it into the corners.
- Warm the extra 2–3 tbsp almond butter slightly if it’s very firm (a few seconds in a pan or microwave). Drop small spoonfuls over the surface of the batter, then drag the tip of a knife or skewer through to create swirls.
- Bake 20–25 minutes until the edges are set but the center still feels soft.
- Cool in the tin, then slice. These are especially good after resting overnight in the fridge; the almond butter firms up and the flavor deepens.
Nutrition note: Almonds bring vitamin E, magnesium and some protein. It doesn’t transform brownies into a “health food”, but it does make them more satisfying – a small square goes further.
Gluten-free oat & date brownies (naturally sweetened option)
If you’re baking for someone who avoids gluten or prefers less refined sugar, this version leans on oats and dates. The texture is slightly different – more like a cross between a brownie and a fudgy flapjack – but still very chocolatey and rich.
Makes: 1 small rectangular tin, roughly 18 x 25 cm
Ingredients
- 150 g pitted soft dates (Medjool or Deglet Nour, weighed pitted)
- 120 ml hot water
- 80 ml coconut oil, melted (or another neutral oil)
- 80 ml plant milk
- 2 tsp vanilla extract
- 100 g oat flour (blend rolled oats in a mixer until fine; use certified gluten-free if needed)
- 30 g cocoa powder
- ½ tsp baking powder
- ¼ tsp fine salt
- 50–70 g dark chocolate chips
Method
- Soak the dates in the hot water for 10 minutes to soften.
- Preheat your oven to 180°C (160°C fan) and line the tin with parchment.
- Tip the soaked dates and their soaking water into a blender or food processor. Add the melted coconut oil, plant milk and vanilla. Blend until smooth – you should have a thick, caramel-like paste.
- In a bowl, whisk together the oat flour, cocoa, baking powder and salt.
- Scrape the date mixture into the dry ingredients and fold to combine. The batter will be thick but spreadable. Add the chocolate chips.
- Spread evenly in the prepared tin and smooth the top.
- Bake 18–22 minutes. As with the other recipes, don’t overbake – the surface should look set but still spring back softly when pressed.
- Cool completely in the tin before slicing. These firm up as they cool and are best the next day.
Note: Because there’s no granulated sugar, you won’t get a shiny top here, but you will get a deep, date-caramel sweetness and a very satisfying chew.
How to adapt the recipes with what you have
Brownies are forgiving. Once you understand the role of each ingredient, it’s easier to make smart swaps instead of rushing to the shop.
- No flaxseed?
In the core recipe, you can simply leave it out. The batter is thick enough to hold together without a formal egg replacement. - Out of maple syrup?
Swap for agave syrup or date syrup in equal quantity. You can also use golden syrup or brown rice syrup, but you may want to reduce the cane sugar by 10–20 g to keep sweetness balanced. - Want less oil?
Replace up to one-third of the oil with unsweetened applesauce or mashed banana. This will give a slightly more cake-like, moist texture and a hint of fruit flavor. - No chocolate chips?
Roughly chop a bar of dark chocolate, or mix in chopped nuts (walnuts, pecans, hazelnuts) for crunch. Toast the nuts lightly in a dry pan first to bring out their flavor. - Need to avoid nuts entirely?
Stick to the core recipe, skip nut butters and choose a nut-free plant milk (oat, soy, rice). Check your chocolate label for “may contain nuts” warnings depending on your level of sensitivity.
Getting the perfect texture every time
Most brownie “fails” come from two places: over-mixing and over-baking. A few practical checkpoints will save you from both.
- Mixing
Once the wet ingredients meet the dry, stir only until you no longer see visible flour. Over-mixing develops gluten (even in vegan batters), giving you a tougher, more cake-like crumb. - Batter thickness
The batter should be thicker than cake batter, almost like a heavy frosting. If it pours like pancake batter, add 1–2 tbsp extra flour or cocoa. - Don’t rely on a clean skewer
Brownies are done when the edges are set but the middle is still slightly soft. A skewer will almost never come out completely clean – you want some moist crumbs, not wet batter. If the top looks dry and cracked all over, you’ve probably gone a bit too far. - Cooling
Hot brownies are fragile. Let them settle in the tin so the starches and cocoa butter can firm up. If you like very neat squares, chill the cooled slab in the fridge before slicing.
Serving, storing and freezing your brownies
Once your kitchen smells like a chocolate shop, it’s worth thinking ahead: what if you’ve baked more than you can eat in two days?
- Serving ideas
– Slightly warm, with a scoop of organic vanilla soy ice cream.
– Cold from the fridge, cut into small cubes and added to a fruit salad with berries.
– Crumbled over coconut yogurt with toasted nuts for a dessert-like breakfast (occasional treat!). - Storing
– At room temperature: keep in an airtight container, 3–4 days.
– In the fridge: up to 1 week. The texture becomes denser and more truffle-like. - Freezing
– Slice and separate layers with parchment. Freeze in an airtight box or bag for up to 3 months.
– To serve, thaw at room temperature for 30–60 minutes or warm gently in a low oven (about 140°C) for 5–10 minutes.
Freezing is especially useful if you like to bake double batches while the oven is on, which saves energy as well as time.
Turning brownies into a reliable “pantry dessert”
One of the easiest ways to eat better (and more sustainably) is to rely on your pantry: dried, tinned and bottled ingredients with a good shelf life. Brownies fit beautifully into this approach, because nearly everything in them stores well.
If you want brownies to be a low-effort option whenever friends drop by, here’s how to organise your cupboard:
- Keep a dedicated “baking box” with cocoa, sugar, baking powder, vanilla and ground flaxseed.
- Rotate your plant milks: use the oldest first, and keep at least one long-life carton in reserve.
- Buy cocoa and chocolate in bulk from suppliers you trust (organic and, if possible, fair trade) and store them in airtight containers away from light.
- Label opened nut butter jars with the date; most keep well for months, but oils can become rancid over time, especially in a warm kitchen.
This way, a tray of rich, vegan brownies becomes less of a “project” and more of a spontaneous possibility – one that aligns with organic ingredients, a more sustainable supply chain and a realistic weeknight schedule.
And if you try one of these versions, consider baking two tins: one for now, one for the freezer. Your future self, coming home tired on a rainy evening, will send you a silent thank you when there’s a square of fudgy chocolate waiting.